This simple DIY Football Themed Sign takes just a few minutes to make and will add a nice touch to your home this football season. Below, I’m sharing detailed instructions on how you can make your own.

It’s Fall, Y’all! That means the leaves are changing, the air is crisp, and football is back! Every year, I believe my teams are going to win it all. Can’t say that actually happens, but I have faith in them. All of them!
Before the games last weekend, I stopped by my local CVS, my one stop shop for game day, and picked up a SNICKERS® bar and SNICKERS® Crisper bar. I used this CVS digital coupon offer to save $1 on the purchase of two single bars.

As I settled onto the couch for what would be one nail biter after another, I realized that we didn’t have any football decor out yet. WHAT?! That prompted me to make this simple DIY football themed sign.
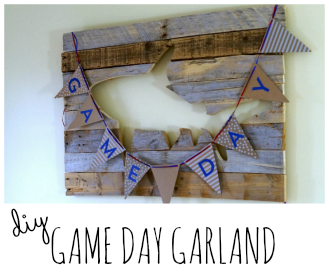
DIY Football Themed Sign
Making a football themed sign is a fun, affordable way to jazz up your home for football season. I love how mine turned out and I am so excited to teach you how to make one of your own.

Wood Board, cut to your prefered size and lightly sanded
White craft paint
Brown craft paint
Foam Paint Brushes
Any color adhesive vinyl (we’re using the vinyl as a stencil, so the color doesn’t matter)
Transfer paper
Decoupage Medium, optional
Silhouette electronic cutting machine
**Instructions for creating a stencil without an electronic cutting machine can be found at the end.
The first step to painting a football themed sign is to paint the background color. I want my sign to be brown with white lettering. I’ll begin by painting my wood board with a light coat of white craft paint.

While the paint was drying, I used this time to enjoy a SNICKERS® bar while designing my stencil. I struggle with choosing fonts, don’t you? There are so many beautiful fonts, but I finally narrowed it down two that I liked. Then, I cut out the phrase using the Silhouette electronic cutting machine.

After the phrase is cut, remove the unwanted vinyl from the design. In the sign making world, we call this process weeding. I am much better at weeding vinyl than I am at weeding my garden.

Take your time with the next step as it can be a little tricky. Place a piece of transfer paper on top of the vinyl phrase. Smooth it out using light pressure to ensure the transfer paper adheres well. Then, gently pull up at a 45 degree angle to remove the adhesive vinyl from the backing.
Affix the vinyl to the wood board you painted earlier. Smooth out the edge and rub them well to ensure they are sealed. You can use a burnishing tool or an old gift card to ensure a smooth seal.

Seal the edges of the vinyl stencil with the same color paint you used to paint the board. In this case, I’m painting over the edges of the vinyl stencil with white craft paint. Let it dry.

To give the sign the appearance that it is old and worn, I am going to lightly apply my top color of brown craft paint. Using long, gentle strokes, my sign looks like the wood grain is showing through and has the old, worn look I was hoping to achieve.

Once you have a light coat of paint applied to the wood, let it dry. The next step is to peel the vinyl from the wood. It’s been my experience that a pair of tweezers works best for this task.

After the last piece of vinyl is removed, seal the sign with a decoupage medium for an added layer of protection.

To make this project without an electronic cutter, look for letter stickers in a variety of fonts. Assemble the desired phrase using the letter stickers and follow the steps above to affix it to the wood board.

This football season, click this link for even more SNICKERS® inspired game day ideas.

Love the sign! I have an electric cutter I haven’t used yet. I really need to get it out of the box! (client)
Fall is definitely the time for some football. I live right by the high school football field and get to enjoy the games quite frequently. If we aren’t able to go down to the field we are able to hear the high school band from inside our home (we are that close), it’s great! Love the sign – thanks for sharing!
This is great! Every time I see these kinds of projects I convince myself I should buy a silhouette!
YES! You should – you can make so many amazing things with one!